

How To Sew A Lined Draw String Bag
Female parent is the necessity of invention, right? Well, I've had a lot of necessities lately! I noticed last week that my favorite makeup bag had a hole in information technology. AND since nosotros are going on a family holiday soon and I needed bags for my kids to shove their stuff in to go on them entertained on the plane trip! Then voila – the DIY Drawstring Handbag Tutorial was born! I call it the "Stuff" purse because you tin can put all kinds of stuff in these and use them for all sorts of purposes! Mine volition be for makeup, but y'all can too use them for trash bags in your car, quiet bags in church, snack bags for on the become… the possibilities are endless!

DIY Drawstring Bag Tutorial Supplies / Dimensions
Here'south how I made mine. The measurements are approximations and will vary depending on the size of the bottom of your bag and how tall you lot want information technology.
Notions: quilting cotton, cording, fusible fleece, lace locks, a bowl, clips/pins, mesh (if you'd like mesh pockets), Fold Over Rubberband (if you lot use mesh pockets), scissors, thread. I highly recommend using Frixion pens for marking on your fabric for the pockets. The ink disappears when you fe over it! Note that my seam allowance is 3/viii″.
The pieces you lot will cut volition be a meridian panel, master console, bottom circle, lining, lining bottom circle and a pocket strip (optional).
DIY Drawstring Handbag Tutorial Steps
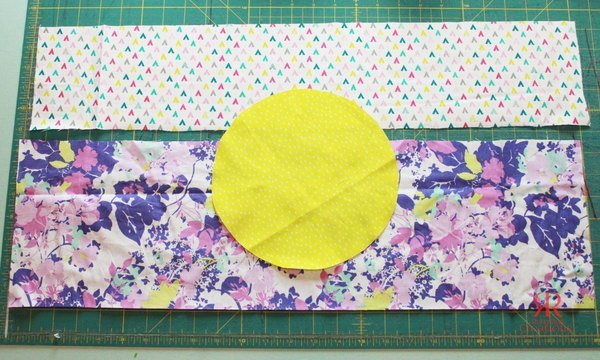
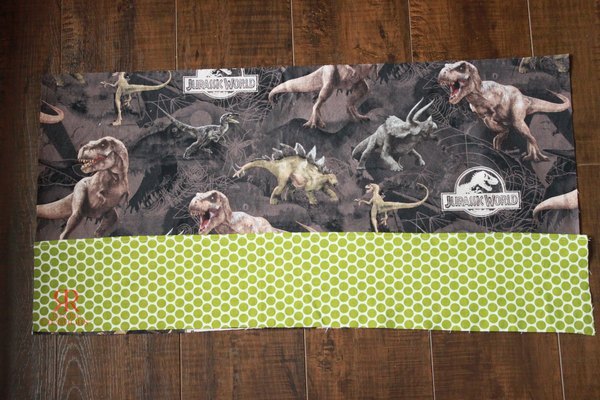
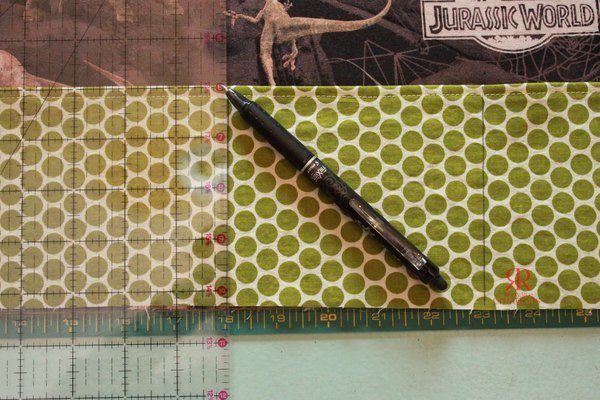
Start by laying a bowl upside downwards on your bottom material. Trace around it with a Frixion pen and cut that out. Measure out the circumference. The width of your meridian and master panels will be the circumference of the bottom panel plus .75″ (for seam assart).
So if my bottom circumference was xx″, so the width of my superlative and main panels would be 20.75″. The tiptop of the top and master panels tin vary and tin be completely customized! My top panel measured 5″x20.75″ and my principal panel measured 7.v″x20.75″.

Let'southward start the construction!
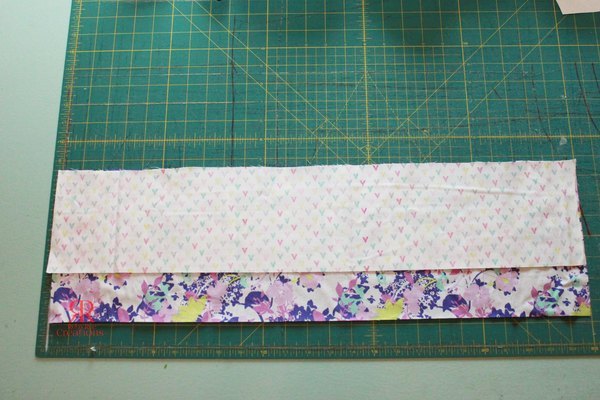
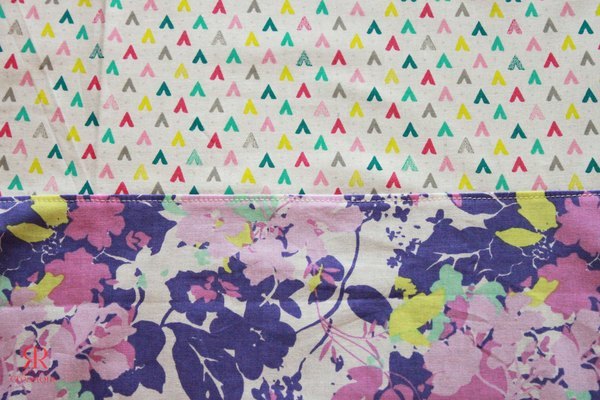
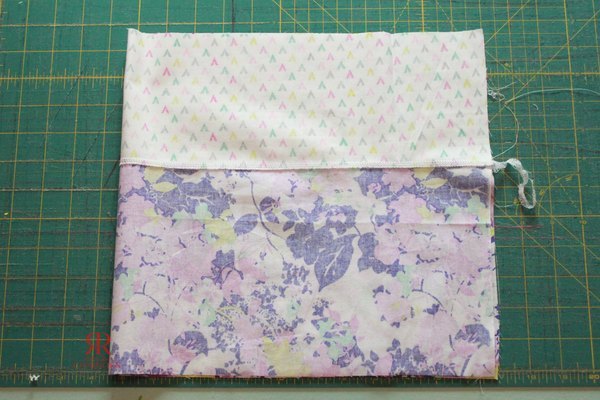
With RST, sew the top panel to the master console along the top edge. Flip the top panel up and press seam assart towards the main panel (y'all tin press either mode, actually). Topstitch 1/8″ away from the seam.
Now cut your lining. Make it the aforementioned superlative and width as the outer portion (tiptop/primary) you simply sewed. Cutting a piece of fusible
fleece the same dimensions as your lining piece and fuse information technology onto the back of the lining textile following manufacturer instructions.
If you'd like pockets, cut a strip that'due south the same width as your lining and any tiptop you lot'd similar. My pockets measured 5″ten 20.75″. If using woven cotton for your pocket, serge/overcast stitch the top edge. So fold the top edge downwards 1/ii″ and topstitch.

If using mesh for the pockets, cut a piece of Fold Over Rubberband (FOE) about 2″ shorter than your pocket strip. Attach it to the top border of the mesh, stretching slightly every bit y'all sew together.
Align the pocket strip along the bottom edge of the lining, matching raw edges. Drip along sides of pockets to concord in place. Individual pocket widths can vary. Utilise your Frixion pen and a ruler to draw vertical lines marking the width of each pocket. Topstitch forth the lines, backstitching several times when you commencement at the top of the pocket. Press to remove Frixion pen mark lines.

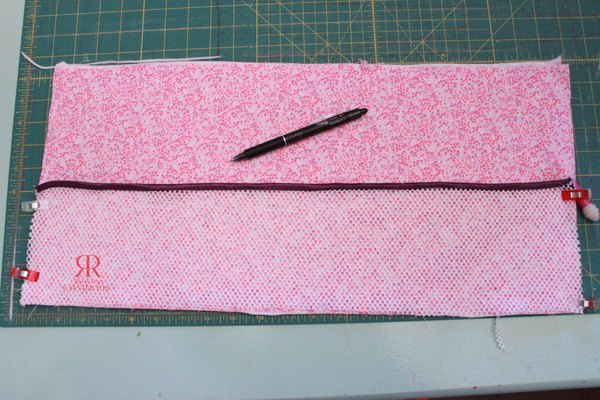
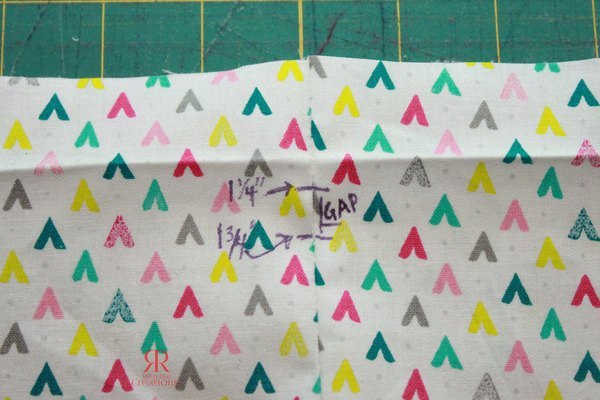
Grab your outer (elevation/main) portion. Fold it in one-half so the short edges meet. With your Frixion pen, make a mark 1.25″ downwardly from the raw edge and another mark i/ii″ beneath that mark. This will be the hole for your drawstring cording. Sew along the short side but Non between the marks y'all just made! Fold the lining in half aligning the short edges and stitch along the short edge.
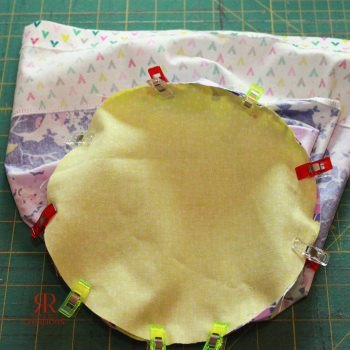
With RST, clip/pen the lesser circle to the outer portion and then practice the same for the lining bottom circumvolve and lining. You may need to ease it a bit to fit. Sew lesser circles on.
With the lining right side out and the outer portion wrong side out, slide the lining within the outer portion. Stitch 3/viii″ from the tiptop raw border, leaving a 3″-iv″ gap for turning.
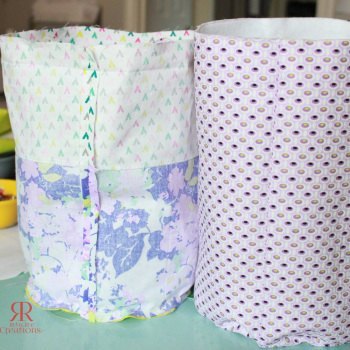
Turn the bag/lining right side out. Button the lining inside the outer and printing the acme edge well. Topstitch 1/8″ abroad from the top edge, taking intendance to close the hole you had from turning the pocketbook.
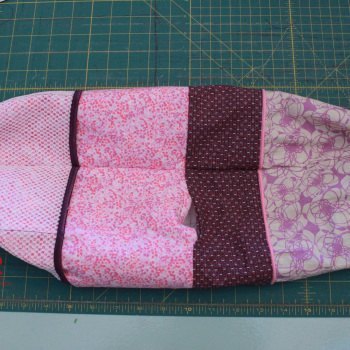
Now create the casing for the cording. Topstitch all around the bag approximately 1/two″ below the stitches from the previous step. From that point, mark 3/4″-1″ below and topstitch around the whole bag (make sure that your drawstring opening is betwixt your casing!). Now you volition accept a casing through which to pull your drawstring. Feed the cording through the casing using a safe pin or bodkin. Once through, slide a lace lock over each end of cording. Brand a knot on each terminate of the cording so it does not come up out of the lace lock.

Now catch as much stuff as you can observe to shove in your all new Stuff Purse!!! A few ideas for customization would be vinyl/embroidered names for personalization, adding piping between the top/primary panels (I did for one of my numberless), adding an exterior pocket, adding internal zippered pocket, creating removable pockets using Velcro. I can't expect to encounter how you customize yours!
Thank you for stopping by and viewing our DIY Drawstring Bag Tutorial. If you enjoyed this you might also similar our Messenger Bag Tutorial. If you need assist with a sewing project, make sure to join our Peek-a-Boo Pattern Shop Facebook Group.


Source: https://www.peekaboopages.com/2017/02/diy-drawstring-bag-tutorial.html
Posted by: belewlecurithe.blogspot.com
0 Response to "How To Sew A Lined Draw String Bag"
Post a Comment